Setup & Configure
This guide will walk you through setting up and configuring the MCP module for your Drupal site.
Install a fresh Drupal CMS (optional)
If you don’t have an existing Drupal site, you can spin up a fresh one using DDEV.
Instructions below are from the official Drupal CMS documentation:
mkdir my-drupal-site && cd my-drupal-siteddev config --project-type=drupal11 --docroot=webddev startddev composer create drupal/cmsInstall and enable the MCP module
ddev composer require 'drupal/mcp:^1.0'ddev drush en mcp -yEnable plugins
The MCP module uses a plugin-based architecture that lets developers extend its functionality. The core module handles the MCP protocol itself and serves as a foundation, but the actual actions and resources exposed to the outside world are defined by plugins.
You can extend MCP functionality in several ways:
- Use the optional submodules included with MCP (described below)
- Install community-contributed plugins
- Create your own custom plugin
Optional submodules
MCP comes with two optional submodules that provide useful plugins:
- mcp_extra - Exposes AI module function call actions, allowing MCP clients to leverage Drupal’s AI capabilities
- mcp_dev_tools - Provides controlled access to Drush commands through the MCP interface
You can enable these submodules individually based on your needs:
# Enable AI agents functionalityddev drush en mcp_extra
# Enable developer toolsddev drush en mcp_dev_tools
Note: for
mcp_extrato expose AI function actions, you’ll need to install and enable the Drupal AI module.
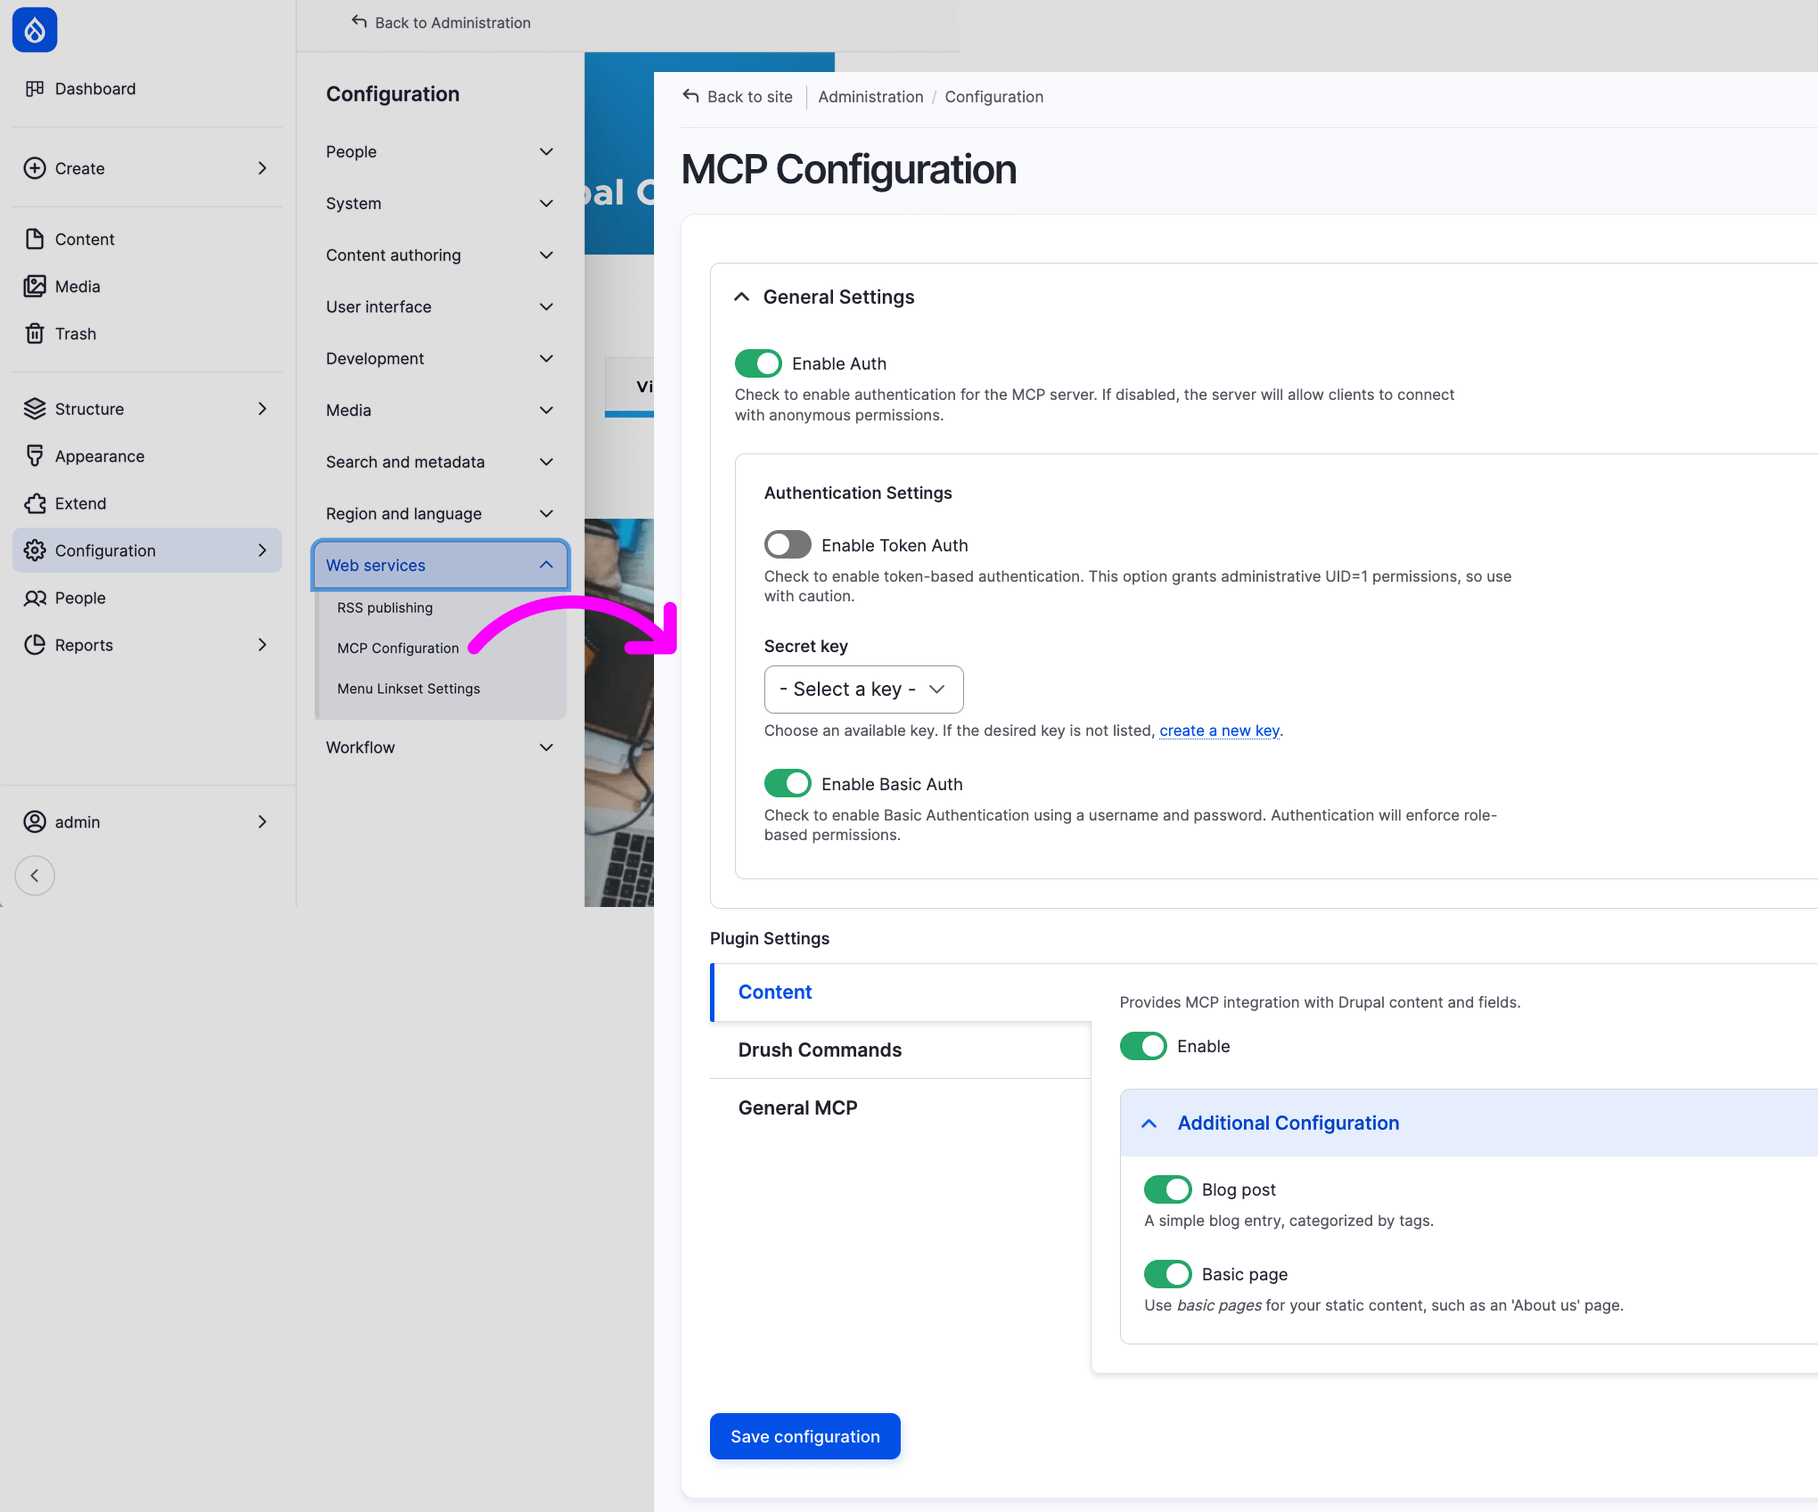
Configure
Once installed, you’ll find the MCP configuration form under Web Services at /admin/config/mcp.
Here you can:
- Enable authentication (token-based or credentials)
- Enable/disable above mentioned plugins
- Configure plugin settings individually
- Select which content types to expose (opt-in by default)
- Configure user permissions for MCP access